How to Create a Long-Form YouTube Video From a Script

So you've got a script. Maybe it's ten pages, maybe it's thirty. Either way, you've done the hard thinking part, and now you're staring at a blank timeline wondering how to actually turn those words into a video people will watch from start to finish. A lot of you have asked about this exact process, and honestly, it makes sense why. Writing a script and producing a video feel like two completely different jobs, and in many ways, they are. One lives on a page and the other lives on a screen, and the path between them is longer than most people expect when they first sit down to try it.
The jump from script to finished video trips up a lot of creators. You can have a brilliant piece of writing and still end up with a video that looks flat, moves too slow, or just doesn't hold anyone's attention past the two-minute mark. That's not a writing problem. That's a production problem. The writing gave you the foundation. The production is where you build the house. And once you understand the steps between 'script done' and 'video published,' the whole thing gets a lot less overwhelming. You stop feeling like you're guessing and start feeling like you're working through a process that actually goes somewhere.
This guide walks you through the full process of turning a long-form script into a real YouTube video. We're talking about recording or generating your voiceover, finding the right footage, building your scenes, making sure your pacing doesn't lose people halfway through, and getting to a final cut you're actually proud of. Whether you're making a documentary, an explainer, or a deep-dive essay video, the core steps are basically the same. The details change depending on your format and your niche, but the bones of the process stay consistent. So let's start at the beginning and work through it in order.
From script to voiceover: your first real production step
Once your script is locked, your first job is getting audio down. Everything else in your video, the footage, the graphics, the text overlays, the music, gets built around that audio track. Think of your voiceover as the skeleton. Without it, nothing else has a shape. This is why skipping ahead to gather footage before you have your narration recorded is usually a mistake. You end up gathering clips that don't actually fit the rhythm or length of what you end up saying, and then you're scrambling to fill gaps or trim things down in ways that hurt the final product.
If you're recording yourself, the setup matters more than the gear. Find the quietest room in your space. Small rooms with soft surfaces like carpets, curtains, or bookshelves absorb sound much better than big open rooms with hard floors and bare walls. Get as close to the mic as you comfortably can, usually about six to eight inches away, because proximity reduces the amount of room noise the mic picks up relative to your voice. Don't wait until you have perfect gear to start. A decent USB mic in a well-treated small room will sound better than an expensive condenser mic in a reverby bathroom. Seriously. The room is more important than the price tag on the equipment.
Record in long takes when you can, not sentence by sentence. It's much easier to edit a handful of long takes than to stitch together a hundred tiny clips that each have slightly different room tones, mic distances, and breath patterns. When you do multiple takes of the same section, don't stop and restart immediately. Pause for a second, take a breath, and try again. That pause makes it easy to spot the retry in your waveform when you're editing. And if you stumble over a particular phrase more than twice, rewrite the phrase. Sometimes the script is just hard to say out loud, and fixing the words is faster than forcing your mouth to cooperate with something awkward.
Not everyone wants to record their own voice, and that's completely valid. Some creators don't like the sound of their voice on playback. Others are building channels around a specific style that doesn't match their natural speaking voice. Some people just have circumstances, like thin walls or a noisy household, that make clean recording genuinely difficult. That's where AI voiceover tools come in, and they've gotten genuinely good over the last couple of years. If you're trying to decide which approach makes sense for your situation, this breakdown of text to speech versus AI voice generators is worth reading before you commit to anything, because the two are often confused and they serve pretty different purposes.
I personally think the recording-yourself route is still the best choice for most creators who want to build a loyal audience, because your real voice carries personality, inflection, and warmth in ways that AI hasn't fully cracked yet. There's something about a real human voice that keeps people listening, especially in long-form content where the viewer is spending thirty, forty, sometimes sixty minutes with you. But for certain formats, especially informational or educational content where the goal is clarity over personality, a well-tuned AI voice works great. If you want to go that route without buying hardware first, you can actually create a professional voiceover without a microphone using AI, and the results can be surprisingly polished. Some creators go one step further and clone their own voice so the AI sounds exactly like them, which splits the difference between efficiency and authenticity really well. There's a solid explainer on how AI voice cloning works if that option interests you.
Once your audio is ready, bring it into your editing timeline and just listen through the whole thing before you touch anything else. Don't start adding footage yet. Don't start dragging clips around. Just put on headphones and listen like a viewer would. Mark the spots where the pacing drags, where a pause feels too long, where you stumbled over a word and kept going, where the energy drops for a stretch. Clean up the audio first. Fix the breathing, cut the dead air, and remove any takes or sections that didn't land the way you wanted. The goal is a track that flows like someone talking to a friend, not like someone reading a report. If you can get it to that place, everything you layer on top of it will feel better too. That clean audio track is your foundation. Build everything else on top of it, and don't skip this step just because you're excited to get into the visual stuff.
Building your scenes: matching footage to your narration
Here's where a lot of first-time long-form creators get stuck. They've got great audio but no idea what to put on screen. The answer is simpler than it seems at first: your footage should illustrate, support, or expand on whatever the narration is saying at any given moment. If you're talking about a city, show the city. If you're explaining a concept, show a diagram or animation that makes the concept concrete. If you're telling a story about a historical event, show something that creates atmosphere and context around that story, even if it's not perfect archival footage of the exact moment you're describing. Viewers are more forgiving about visual approximation than you'd think, as long as the logic of the image connects to what they're hearing.
For most long-form YouTube videos, you're working with a mix of what's called A-roll and B-roll. A-roll is your main footage, usually a talking head or any shot where the primary narration is happening visually on screen. B-roll is everything else, the supporting footage that gets laid over your voiceover to illustrate what you're saying. If you've ever watched a documentary and noticed how the narrator keeps talking while the camera cuts to landscapes, archival photos, or slow pans across objects, that's B-roll doing its job. It carries the visual weight of the video while the narration carries the informational weight. Understanding how these two types work together is fundamental to long-form production. This breakdown of A-roll versus B-roll for YouTube documentaries is one of the clearest explanations out there if you want to go deeper on the concept before you start building.
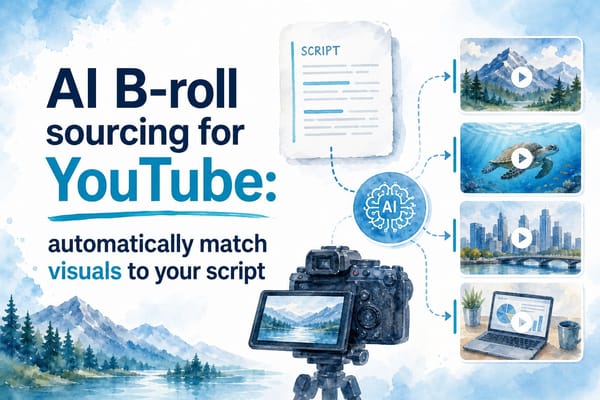
Finding good B-roll is its own skill, and for a long-form video you might need dozens or even hundreds of clips to cover your entire narration. If your video is thirty minutes long and you're cutting a new clip in every five to ten seconds of footage, the math adds up fast. The good news is you don't have to film everything yourself. Stock footage sites, archival libraries, government databases, and Creative Commons sources can cover a huge amount of ground depending on your topic. History channels pull from public domain archives. Science channels use NASA footage, which is almost entirely public domain. Business and finance channels use a mix of stock footage and screen recordings. The guide on how to find B-roll for long-form YouTube videos covers the practical sources and how to use them without getting into licensing trouble, which is a real concern if you ever plan to monetize.
I remember the first long video I ever put together. I kept running out of footage about halfway through each section and ended up staring at gray timeline bars wondering what to put there. I'd start hunting for clips mid-edit, which broke my focus, slowed everything down, and made the whole process feel chaotic. The fix was learning to plan my scenes before I started sourcing footage. If you think through your script in terms of scenes first, treating each main idea as its own visual unit, the sourcing process becomes much more organized. You know what you need before you go looking for it. A good place to start that planning process is thinking about how many scenes your video actually needs, because the answer might surprise you. Most creators either over-segment their videos, cutting so often the viewer never settles into anything, or under-segment them, holding on shots so long the pacing dies. Both cause viewers to leave, just for different reasons.
Beyond standard footage, certain types of long-form content benefit enormously from custom visual elements like maps, charts, timelines, and data visualizations. If you're making videos about history, geopolitics, business, economics, or science, these elements do serious work. They give viewers something concrete and informative to look at while the narration explains ideas that would be hard to visualize any other way. A map showing the spread of an empire over time communicates something in five seconds that would take two minutes to explain in words alone. There's a whole approach to using maps and charts in YouTube videos that can make your content look significantly more polished and credible without a massive production budget, and it's worth understanding before you write off those visual formats as too complicated to pull off.
Once you've got your footage organized and your scenes roughly mapped out, start laying clips into the timeline in sync with your audio. Line up the start of a clip with the moment in the narration where that image becomes relevant. Don't aim for perfection on this first pass. Just get coverage down, meaning every section of your audio has something visual over it. Then go back and refine. Swap out clips that don't quite fit. Trim ones that linger too long. Add graphic elements where the footage alone isn't doing enough. This iterative approach is how every professional editor works, and it's much less stressful than trying to get everything perfect on the first placement.
Editing, pacing, and finishing your video
Editing a long-form video is where patience really pays off, and it's also where the video transforms from a collection of pieces into something that actually feels like a finished product. The rough cut is just the beginning. Your first assembly will probably be too long, too slow in certain sections, missing transitions that help viewers follow along, and maybe inconsistent in energy from one part to the next. That's completely normal. Every editor goes through this phase. The goal of the first cut is just to get all your pieces in the right order. The goal of every cut after that is to make the video feel like less work to watch.
Pacing is the thing most people underestimate when they're new to long-form editing. A long video doesn't have to feel long. Think about the documentaries or YouTube essays you've watched that kept you genuinely hooked for an hour without noticing the time pass. The pacing kept changing just enough to keep your brain from getting bored. Short clips gave way to a longer scene. A graphic broke up the talking. A piece of music shifted the tone. Then it went back to narration over footage with a different visual texture. That variety is what keeps people watching. If your video is thirty minutes of the exact same shot style and cutting rhythm with no variation, viewers will start tuning out even if the content itself is legitimately great. In a previous article about building long-form content structures, we touched on how the rhythm of your edit communicates trust to the viewer. When the editing feels alive, they feel like they're in good hands. If you're making a specific format like a top ten or a list video, there are real techniques for making those videos longer without adding filler, and they work by adding actual substance and depth to each entry, not by padding with repetition or unnecessary recap.
Music matters more than most new creators realize, and it's worth spending time on it rather than just dropping in the first royalty-free track you find. A good underscore keeps the energy up during slower narration sections and signals emotional shifts to your audience in a way that feels natural rather than forced. Think about what tone each section of your video needs. An introductory section that's setting up stakes might want something with a sense of momentum and build. A section going deep into detail might need something more neutral and understated so the music doesn't compete with the complexity of what you're explaining. A conclusion might need something that feels resolved or earned. Use royalty-free music from reputable libraries and take the time to set your volume levels properly. Music that's too loud will exhaust listeners over a long video. Music that's too quiet might as well not be there. Aim for a level where the music clearly supports the mood without the viewer consciously noticing it's there.
Sound design beyond music is something even experienced creators often overlook. Ambient sound, subtle sound effects timed to graphic transitions, and natural audio from footage clips can all add texture to a long-form video in ways that make it feel more immersive and produced. You don't need a Hollywood sound budget. Even adding a faint room tone under sections where your narration runs over still images can make the audio feel less sterile. These are small details, but over the course of a thirty or forty minute video, small details compound into an experience that either feels professional or feels unfinished.
Once your edit feels solid, export a draft and watch it somewhere that isn't your editing computer. Watch it on your phone. Watch it on a TV. Pull it up in a browser and let it play the way a real viewer would watch it. That change in context reveals problems your editing brain will miss after hours of staring at the same timeline. Does the color look weird on a smaller screen? Does the audio feel thin through laptop speakers? Does a section that felt fine in your edit now feel slow when you're watching it the way a real viewer watches? Fix those things before you commit to your final export. It sounds like extra work, but it almost always catches at least one or two things that would have made you wince after publishing.
Add your end screen, cards, and chapter markers before you finalize. Chapter markers are especially important for long-form content because they let viewers navigate the video without scrubbing blindly through the timeline, and they signal that the video has a clear structure worth investing time in. YouTube also uses chapters in some of its internal discovery systems, so they serve a practical purpose beyond just viewer convenience. Different long-form formats have their own specific finishing considerations too. Historical documentaries need particular attention to how archival sources are attributed visually. Business documentaries often need a clear narrative arc that connects data to human outcomes. Geopolitics videos need maps and context that help viewers understand geography and history simultaneously. Science explainers need to balance accuracy with accessibility in ways that are harder than they sound. There are format-specific guides on making historical documentary videos, business documentary videos, geopolitics videos, and science explainer videos that go into the specific details you'll want when you get to that level of refinement. The more you understand the conventions of your format, the better you'll know when to follow them and when to break them for effect.
Ready to take the next step?
Creating a long-form YouTube video from a script is a real process with real steps, and once you've done it a few times, it stops feeling like a mountain and starts feeling like a familiar trail. You find your rhythm. You get faster at sourcing footage, building scenes, and knowing when a cut is clean enough to move on. You develop instincts for pacing that are hard to explain but easy to feel once you've put in enough hours. The hard part isn't any single step in the process. It's keeping all the pieces organized and moving forward while you work through them, because long-form production has a lot of pieces. If you want a tool that's actually built for this kind of work rather than adapted from something else, check out Kliptory. It's designed specifically for creators making long-form content, and it handles a lot of the heavy lifting around footage organization, scene building, and production workflow that usually slows people down right when they want to be moving fast. Drop a comment below and let me know what part of the script-to-video process gives you the most trouble. I read every single one.